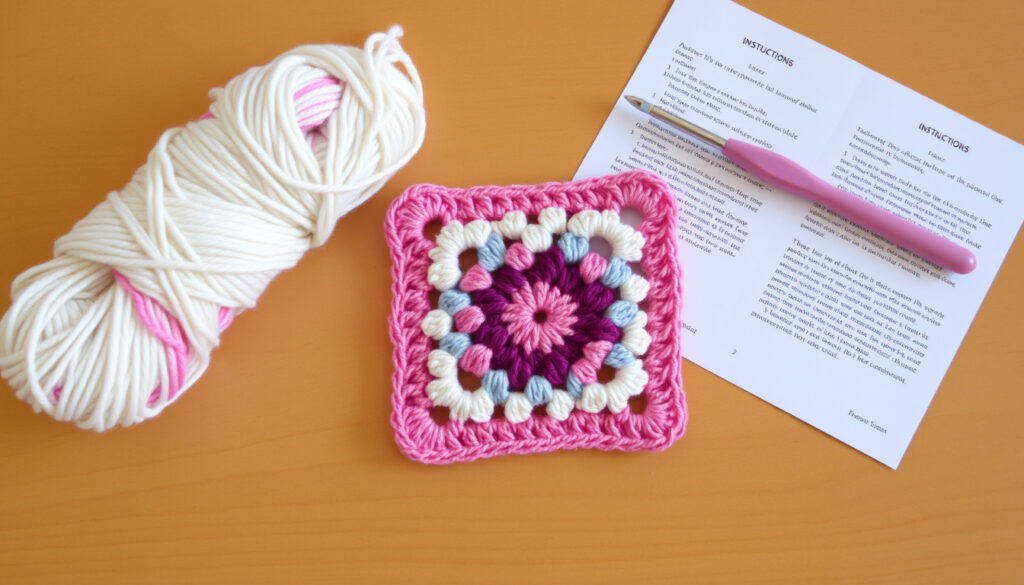
How to Crochet a Granny Square: Step-by-Step for Beginners
There’s a moment every crochet beginner hits: you’ve mastered the chain stitch and the double crochet, and now you want to make something that actually looks like a thing — the granny square is that gateway project. This guide walks you through the classic solid granny square, avoids the endless variations that confuse newcomers, and directly addresses the most common mistakes that trip up first-timers.
Popular granny square colors in 2025: pastels, neutrals, and earthy tones · Approximate time to complete one square: 15–30 minutes for beginners · Typical number of squares for a lap blanket: 30–40 squares (6 inch each) · Most common yarn weight used: worsted weight (category 4)
Quick snapshot
- A basic granny square uses double crochet and chain stitches (Ganxxet (craft tutorial site)).
- Starting chain of 5 or a magic ring is standard (Ganxxet).
- Corner spaces require 2 chain stitches to keep the square flat (Instructables (maker community)).
- Exact optimal hook size may vary by yarn weight and personal tension.
- The “best” starting method (magic ring vs chain 5) is a matter of preference.
- Number of squares for a blanket depends heavily on desired drape and square size.
- A 2024 updated beginner video demonstrates chaining four, inserting into the first chain, and closing the ring with a slip stitch (YouTube (video tutorial)).
- Granny squares can be joined into larger pieces such as blankets, bags, and garments (Ganxxet).
Below is a quick-reference table of the essential specs for a classic granny square.
| Attribute | Value |
|---|---|
| Number of double crochet clusters per round | Round 1: 8 clusters; Round 2: 12 clusters; Round 3: 16 clusters |
| Typical chain spaces at corners | 2 chain stitches between each 3-dc cluster group at corners |
| Standard yarn weight | Worsted weight (category 4) |
| Recommended hook size | H-8 (5.0 mm) |
| Time for first square (beginner) | 20–40 minutes |
| Time for later squares | 10–20 minutes |
| Approximate size after 3 rounds | 4 inches (10 cm) |
How to crochet granny squares step by step?
Whether you’re following a maker community tutorial or a crochet designer’s blog, the mechanics are the same — a ring, clusters, and corners. The classic solid granny square uses only double crochet and chain stitches, which makes it the perfect training ground for absolute beginners.
-
Make the starting ring
- Chain 4 (some guides use chain 5; 4 gives a tighter center).
- Insert hook into the first chain and slip stitch to form a ring (Instructables).
- Alternatively, use a magic ring for a fully closed center (Ganxxet).
-
Work the first round of clusters
- Chain 3 (counts as first double crochet).
- Work 2 double crochets into the ring — that’s your first cluster.
- Chain 2, then work 3 double crochets into the ring. Repeat three more times.
- You should have four clusters (each 3 dc) separated by chain-2 spaces. Slip stitch to the top of the starting chain-3 to close the round (Bethany Lynne Makes).
-
Complete the second round
- Begin in a corner space (not on an edge) to preserve the square shape (Hanjan Crochet (tutorial site)).
- Chain 3, then work 2 double crochets in the same corner space.
- Chain 1, then work 3 double crochets in the next corner space, chain 2, then 3 double crochets in the same space (corner made).
- Continue around: chain 1 between side clusters, chain 2 at corners. Slip stitch to close.
-
Finish the final round and fasten off
- Repeat the pattern: corner clusters with chain-2, side clusters with chain-1.
- After the last round, cut yarn leaving 6–8 inches (Instructables).
- Pull the tail through the loop and weave it in with a yarn needle.
A beginner who follows this exact sequence will produce a flat, square shape every time — because the corner chain-2 and edge chain-1 ratio is the geometry that makes the granny square work.
The implication: once you internalize the corner chain-2 and edge chain-1 ratio, every subsequent square will be flat and consistent.
Bethany Lynne Makes recommends chaining 3 at the start of a round as counting as the first double crochet, which simplifies the stitch count for beginners.
How many chains to start a granny square?
The number of chains in your foundation ring directly affects the size of the center hole. Four chains is the most common starting point for a solid granny square, but variations exist.
Using a chain 5 foundation
- Chain 5 and join with a slip stitch. This creates a slightly larger center hole, which some beginners find easier to work into.
- Some patterns use chain 5 to allow more room for the first cluster, especially if your tension is tight (Ganxxet).
Using a magic ring alternative
- A magic ring (adjustable loop) gives you a completely closed center — no hole at all.
- It’s a bit trickier to learn, but many crocheters prefer it for projects where you want a solid beginning (Ganxxet).
Why chain count matters for square size
- Chain 4 gives a center hole about ¼ inch in diameter.
- Chain 5 gives a hole roughly ⅜ inch.
- For a significantly smaller center, try chain 4 — or use a magic ring (Dream a Little Bigger (craft blog)).
Choose chain 5 if you’re a total beginner and want visibility. Switch to a magic ring once you’re comfortable — it gives a cleaner look for blankets and garments.
The trade-off means you can choose based on your comfort level; the key is to keep the center hole consistent with the intended look of your project.
What are some common mistakes to avoid when crocheting granny squares?
Based on feedback from crochet communities, the most frequent errors are easy to fix once you know what to look for. Here are the top five, with corrective steps drawn from experienced designers.
Twisted or uneven stitches
- Cause: inserting the hook into the wrong loop or twisting the chain.
- Fix: always work into the top of the stitch, not the back loop only. Turn your work each round for a flatter result (Hanjan Crochet).
Too many or too few stitches in corners
- Cause: adding extra stitches at corners or skipping the chain-2 space.
- Fix: count your clusters each round. Each corner should have exactly one 3-dc cluster, chain 2, and another 3-dc cluster (Instructables).
Using the wrong hook size
- Cause: hook too small makes stiff squares; too large makes them loose.
- Fix: worsted-weight yarn typically pairs with a 5.0 mm (H-8) hook. If your square curls, try a larger hook; if it ripples, go smaller.
Miscounting corner spaces
- Cause: forgetting to chain 2 at corners, or accidentally chaining 1.
- Fix: mark each corner with a stitch marker until you develop the rhythm (Instructables).
Using different stitch heights across rounds
- Cause: pulling the yarn tighter or looser as you go.
- Fix: maintain even tension. If you notice a change, frog the offending round and redo it (Ganxxet).
Being aware of these common pitfalls and checking your work after each round will save you time and frustration.
Hanjan Crochet advises beginning in a corner space to preserve the square shape, a technique that prevents the square from becoming misshapen.
How many granny squares would it take to make a blanket?
Planning a blanket project requires knowing how many squares you’ll need. The table below gives you exact counts for the most common blanket sizes and square dimensions.
One number, one pattern: larger squares reduce total count but increase the weight and drape of the blanket.
| Blanket type | Dimensions (inches) | 6-inch squares | 8-inch squares |
|---|---|---|---|
| Lap blanket | 36 × 48 | 30 | 18 |
| Throw | 50 × 60 | 80 | 45 |
| Twin bed | 66 × 90 | 165 | 93 |
| Queen bed | 90 × 100 | 240 | 135 |
The pattern: a 6-inch square lap blanket requires approximately 30 squares, while a throw blanket of 50×60 inches needs about 80 squares. If you use 8-inch squares, the count drops to 45 for a throw (Dream a Little Bigger).
What is the easiest granny square pattern?
For absolute beginners, the classic solid granny square is the simplest. It uses only double crochet and chain stitches, avoids color changes, and produces a dense fabric ideal for blankets.
The classic solid granny square
- No open gaps — each cluster sits next to the last.
- Single color throughout (or simple color changes at the end of a round).
- Many beginners complete their first square within 30 minutes (Bethany Lynne Makes).
The open center granny square
- Features a larger center hole and chain-1 spaces between side clusters.
- Lighter, airier fabric — good for summer throws.
- Slightly more complex because of the chain-1 pattern consistent across rounds.
Why the pattern is considered beginner-friendly: it builds muscle memory for the three-stitch cluster and the corner chain-2, which are the foundation of virtually all granny square variations.
For a confident first success, the solid granny square is the clear choice, providing a foundation for countless projects.
Once you’ve mastered one square, you can join them into a lap blanket, a scarf, or even a bag. The key is to keep your tension consistent and count your corners every round.
For the beginner who wants a finished project in a weekend, a lap blanket of 30 six-inch squares is the sweet spot. The implication: start with a simple color palette, stick to the same yarn weight, and you’ll be weaving in tails before you know it.
offthehookforyou.co.uk, youtube.com, dreamalittlebigger.com, hanjancrochet.com
Once you master the basic square, you can explore free granny square patterns to create blankets, bags, and more.
Frequently asked questions
What yarn is best for a granny square blanket?
Worsted weight (category 4) acrylic or cotton yarn is ideal for beginners — it’s affordable, easy to work with, and holds its shape well.
Can I mix different yarn weights in one granny square project?
It’s possible but not recommended for beginners. Different weights create uneven sizes and tension, making joining difficult.
How do I join granny squares together?
The most common methods are whip stitch (quick and easy) or slip stitch join (seamless). Both work well with the same yarn weight.
Why is my granny square curling?
Curling usually means your corners don’t have enough chain stitches. Make sure you are chaining 2 at each corner, not 1.
How do I change colors in a granny square?
At the end of a round, slip the new color through the loop and weave in the old tail. Some guides recommend changing colors at the corner for a cleaner look (Dream a Little Bigger).
What is the difference between a solid and open granny square?
A solid square has no gaps between clusters on the sides; an open square uses chain-1 spaces between clusters, creating a lacy look.
How many granny squares for a twin bed blanket?
For a 66×90 inch twin bed, you need about 165 six-inch squares or 93 eight-inch squares.
More related posts
 The West Cork Hotel: Complete Guide to Skibbereen Accommodation
 Spider-Man: Brand New Day (2026) – Cast, Plot & Release Date
 Premier Inn Rest Easy: Reviews, Complaints & Legal Case
 Profit and Loss Account: Definition, Format & Examples
 Consumer Rights Act 2022: Your Guide to Irish Consumer Law
 Norcenni Girasole Tuscany Italy: Location, Activities & Travel
 Sydney Sweeney Housemaid Hotel Scene Explained & Deleted Details